hi—I’m making a multilayer family, and have gone through the tutorial to make sure I understand. when I get to linking metrics between masters, however, I begin seeing inconsistencies. (this is in 2.4.2. (991)): specifically, these:
sidebearings between masters are linked as expected, and behave as expected when nudged in master 1.
kerning between masters, is sort of linked in that I can’t edit kerning in masters 2-4 (as I would expect), but kerning from master 1 is not showing in any of the other masters.
however!
I changed a value in a kerning pair in master 1 to test, and looked at other layers. the visual change in spacing was reflected in master 2, but not masters 3 & 4. even stranger, when I flipped back to master 2 a second time, there was again no kerning displayed at all.
so I’m wondering if I have my masters linked and defined correctly for this to work. here’s what I have:
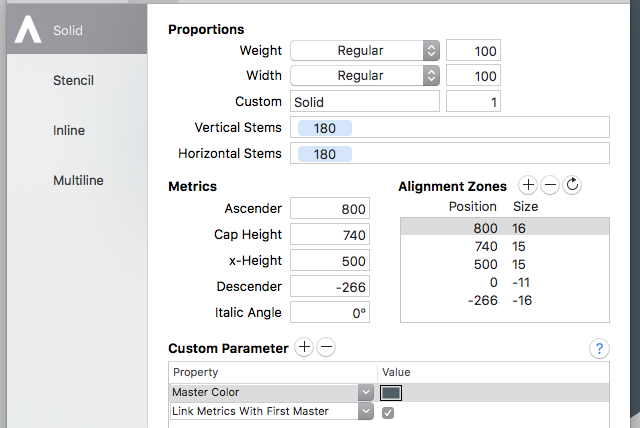
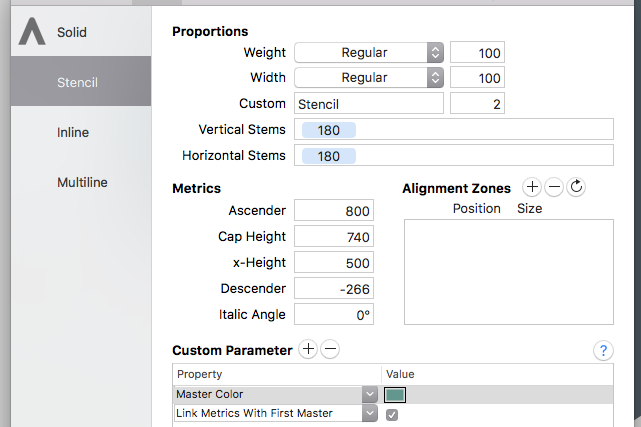
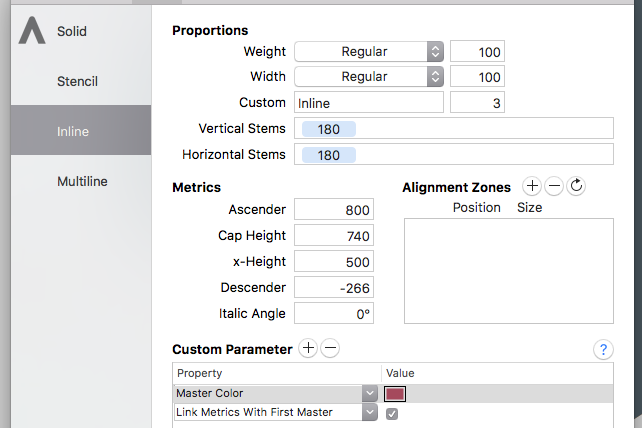
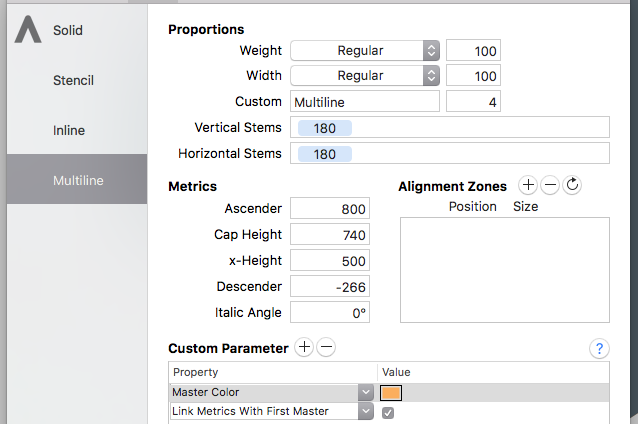
(there are no alignment zones defined in master 2-4 yet because I only have a couple glyphs drawn as yet.)
so, I’m kinda stumped about this one. anyone see anything obviously wrong?
Can you remove the parameter in the first master?
yes, I tried that too (that was actually the way I originally had it set up). same result.
as an update: the metrics export as they should (I tested in Photoshop and InDesign and also opened the resulting Opentype files in glyphs to check). it isn’t behaving only inside Glyphs.
Can you send me the .glyphs file?
emailed to info@.
of note: features are currently disabled for export since some of the characters are missing in everything but the main typeface, so the export would fail with features enabled. this thing with metrics linking was occurring with or without features enabled. (if it matters at all for your purposes.)
The problem was that he selected different layers from the layer panel in stead of switching the whole edit view from the toolbar. glyphs from different masters can’t be kerned.
to finish this thread out with an answer: nothing was going wrong. I was using the interface in a way it wasn’t intended. this is my first multi-layer family, and the language in the tutorial for that says to add a custom parameter for every master, linking to the metrics of the first one.
this led me to believe that flipping through layers in the actual layer panel would show the visual layers stacked up with kerning from the first one included—even if different layers are selected for different letters—since ostensibly they all have the same kerning and nothing should display differently.
the tutorial should 1) say that the custom param should be included in all masters except the first one, 2) elaborate that the layers palette isn’t really meant to for selecting layers in this context—that’s for the masters buttons, and 3) clarify that the image showing differently-colored layers activated and moving their kerning back & forth is just an illustration of the link. it’s a little correction, but one that cleared up a lot for me.
that usage (using layers to flip between different masters in the layered-family context) was an assumption I made from many years of working in Adobe’s interfaces, never seeing any other apps use a layers paradigm, and therefore not thinking to use layers differently from Adobe’s intention.
And the toolbar bottons have shortcuts attached: cmd+1, 2, 3 …
right. I use those when interpolating a family of weights. I should add that the only reason I made this mistake is the conceptual emphasis upon layers & stacking in the idea of a layered typeface.