SF Symbols (tutorial)

Hi,

I am very novice in Glyphs (trial), so please near with me + I apologize for my ignorance at this moment.

Firstly: I am not using Glyphs for font design. I intend to use Glyphs just for designing custom SF Symbols. Why? I saw this tutorial and liked the option to automatically generate instances. This would be convenient, as Apple provides a template with 27 symbols in it.

Trying to use the approach as explained in the tutorial, I am runnign into a problem with interpolation (brace layers).

What I did (following the tutorial):

  • import the apple template (success)
  • edit the first (ultarlight-S) master glyph
  • when done: copy the path of that design into the other masters (ultralight-L, Black-S and Black-M)
  • transform the glyphs: scale up a bit for ultralight-L; make bolder for Black-S; Bolder +S cale for Black-L)

Net I try to re-interpolate the brace layers. This is the point where things go wrong. Some brace layers do get generated, others do not (remain empty).

At first I assumed I must have made an editing error in one of the “copies”, but I made sure to make a clean copy and just transform the paths (one simple action). I verified the paths: no errors to be seen or found enverywhere. I als otried converting a brace layer to a master layer", but that did not seem to work (nothing happened), so that yielded no succes either for me (though I would not expect that to be the problem anyway, because otherwise the tutorial would probably have made mention of it).

When I view Show Master Compatibility, the layers that I would expect to be interpolated remain empty, except for the first and the last brace layers: ‘middle layers’ remain empty.

One other thing that surprised me is that the plugin does not create any instances, just four masters and a bunch of interpolated brace layers.

TO TRY THIS YOURSELF (short & simple):

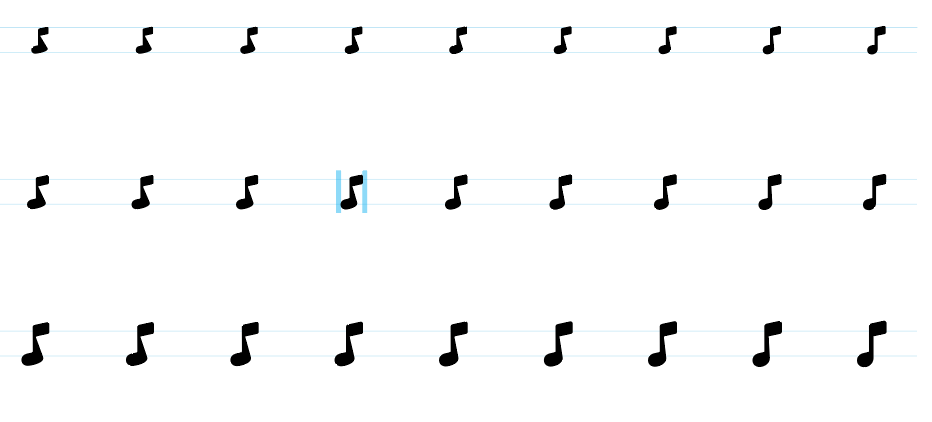
  1. open SF Symbols2.app, export music.note (results in music.note.svg file)
  2. open Glyphs 2.6.5 (plugin installed)
  3. import the svg file from step 1
  4. in the four masters, drag a node to some offset location (symbol slightly changes, use the same node everywhere)
  5. re-interpolate

Using ‘Show Master Compatibility’ You wil lsee that onyl the first and the last brace layers chage, the three in the middle do not change. I do nt understand why not all layers change. Is the tutorial lacking a necessary step perhaps? Did I maybe overlook something?

Could anybody please explain what I am doing wrong here? Is my assumption that I should create the four masters to my liking (assuring to keep the number of nodes equal and not mess that part up), and then generating the other images wrong?

Given my being new to Glyphs, a simple and understandable explanation would be appreciated.

Thank you!

Hi, I hope I understand you correctly. Following your description, I tried to reproduce exactly what you did: Edit the first (UltraLight-S) master, copy that path to the other masters, then re-interpolate the brace layers (or bracket, no idea, I always mix up the names). Works fine for me. The three brace layers don’t interpolate because they are sandwiched between each other – meaning if you re-interpolate one, it is not interpolated from the masters, but from the layers directly adjacent to them in the design space (in this case, the other two brace layers). So, since they are sandwiched between each other, they will only ever interpolate between each other. Does that make sense?

Addressing the more important issue you appear to have, you say that when re-interpolating some of the brace layers, they stay empty. This probably means that you first deleted the paths in the respective brace layers and then re-interpolated them (which is not necessary, you can just leave the old paths there). The fact that he layers stay empty is due to the same issue I described above: the brace layers are sandwiched between each other, so if one brace layer is empty, you are telling Glyphs to re-interpolate from either two empty brace layers (compatible, but the result will of course also be an empty layer), or one empty brace layer and a master (not compatible, also resulting in an empty layer).

The solution here would be to delete the brace layers (make sure to note down their values, because you will probably want to re-create them in the next step) and then, one by one, rebuild them by re-interpolating from the adjacent masters. So, like this:

  1. delete two of the three brace layers which aren’t re-interpolating (note down their names!)
  2. when you only have one brace layers sandwiched between the masters, re-interpolate it
  3. add the next brace layer, re-interpolate it

Looking at this more generally, if you are re-interpolating brace layers anyway, they don’t serve a purpose to you, unless you are using them to alter the design at specific points of your design space. Check out this explanation on what brace layers are for.

So, probably you don’t need the brace layers anyway. Hopefully my explanation cleared things up a bit for you, don’t hesitate to ask if something remains unclear :slightly_smiling_face:

1 Like

Hello Scarwe,

Thank you very much for your answer.

I verified: indeed, the brace layers will not re-interpolate unless they are enclosed by master layers. This is pretty inconvenient, because it means one has to recreate the brace layers manually each time the design changes (it is ad umb process: rename layer, the manually re-interpolate each layer, and rename back). I wonder why this has not been automated (yet), becase it is a highly repetitive (and time consuming) task.

To circumvent the above, I tried to convert the “middel layer” of the three brace layers into a master, btu somehow that does not work (no idea why, or maybe I am just not aware of what should happen yet: I would expect the brace layer to be convert into a master layer, jsut like the other ones. That would solve the issue, as there would not be any adjacent brace layers left, at the expensive of one more master to maintain).

As to your remark that the layers may not serve a purpose: I think they do, as the plugin needs to "re generate the apple template, which is done by exporting the end-result. That export contains all icons needed).

Your explanation helped quite a bit, so I am very glad you took the time to answer my question.

I am a little less happy with the amount of ‘manual tweaking’ that remains to be done, because Glyphs seemed perfect to me for designing icons and exporting them to the apple icon template (used in xcode).

I will investigate further if Glyphs can be sufficiently helpful for what I intend to use it for, I hope so, because in general I like Glyphs (i.e. except for the price which is quite steep for just generating icons).

Thanks again!

1 Like

I understand. So the export function of the SF symbols plugin requires the brace layers as reference for what to export, that makes (some) sense.

Regarding “converting” a brace layer to a master: It doesn’t create a new master from the brace layer (as the master count is defined in the file and can’t vary from glyph to glyph) but instead replaces the content of the master above the brace layer with the content of the brace layer. This is definitely not what you want to do, as it will completely screw up the design.

I’m afraid I can’t think of a more efficient solution than doing it a lot by hand, sorry, but maybe some other wizard here can help you out.

I noticed that trying to convert the brace layer is not what should be done :wink: As a novice it seemd logical to assume that optin ‘use as master’ does turn a brace layer into a master layer. I understand now that that is not the case. Thanks for explaining!

I hope that a next version of Glyphs takes care of the ‘manual repetition’. This is an ideal candidate for automation. And it would save so much time…

Maybe somebody will come up with an improved plugin to do the job, but I won’t get my hopes up.

Scarewe, you have been a great help to me. Thank you very much.

An option such as “re-interpolate from masters” would actually make a lot of sense (though, in type design, it is fairly uncommon to have more than one brace layer). Maybe the menu text can switch to from master when holding Option or something. Maybe Georg and/or Rainer can give some insight as to whether this would make sense? :slightly_smiling_face:

I am continuing to experiment and (despite my followoing your instructions), I sometimes encouter empty content. This all seems related to the adjacent brace layers. As far as I can see now, it is unavoidable.

Unfortunately I cannto get in touch with the person that wrote the tutorial, as this seems like a relevant part to mention (possibly discuss) in the tutorial as well. (Apple has just begun pushing their SF Symbols a bit more, so I would assume moer developers to start looking for a proper tool to help them make custom icons. They will likely also see the tutorial…)

Continuing digging into the dos and donts…

What happens when you remove the brace layers and export an SF symbol file?

Okay, I tested removing the brace layers and exporting using the script. It works fine. So you can just delete the brace layers (if you are only re-interpolating them anyway).

…As far as I can see now: all 27 icons then become identical.

PS: might you want to try: it is quite easy and quick if you follow the steps described in my original post. PS: to make that easier for you I tried uploading the template file from the first step, but… I am not allow to uplodad files as a new user on this forum…

Looks fine on my end. Here is the .glyphs file (I just moved one node in each master, it’s art, don’t @ me)

Music Note.glyphs (10.2 KB)

The exported .svg (which one is not allowed to upload here) also looks fine, different sizes and all. Try exporting from the above file.

When I open your final result (exported file), it seems like all icons on a row are identical (no differentiation on the weight axis). That is: all S icons are identical, all M icons are identical and all L icons are identical. Looking at one row at a time, there is no difference between 'ultralight and ‘black’, or anthing in between.

Could this possibly be just optical (not enogh differentiation in the example to see with the naked eye)?

PS: on loading your file, Glyphs showed warning that my version is newer (1342) than yours (1286), so might you see very different results, then that could be worth looking into.

When I overlay the Black and the UltraLight icons, they are definitely different. The difference is not that pronounced, but it’s definitely there.

image

Scarewe, thanks for checking. In the meantime I made a more distinctive change between BLACK-S and BLACK-L and in my result I (so far) see no visible difference).

Please allow me to investigate in detail and dig in a bit deeper tomorrow (I have to go to a meeting in a moment). I will let you know whatsoever, hoping your findings are verifiable on my side.

Thanks!

Can’t reproduce. It interpolates fine on my end.

Music Note.glyphs (5.3 KB)

No, I am using an older Glyphs version because I get an unresolvable update error (something about read-only location, despite it being in my Applications folder). I don’t look forward to completely reinstalling. Furthermore, it seems to work better than your version in regards to SF symbols :grin:

…unless I am making some silly mistake, that is what it looks like. I will see if I can download some older version tomorrow, to prevent myself from going bonkers :wink:

Thank you so much! I will let you know if I discover any peculiarities.

If the differences are so subtile, you can remove all the intermediate masters/brace layers. And as long as you would just use them after re-interpolating is quite a good case to remove them. You might be fine with the four corners of the space.

But if you like to keep them, just copy a compatible outline in each of the master and re-interpolate them a few times until all changes have settled.

Good morning Scarewe,

This morning I took a fresh new look at the example (Music Note.glyphs file) you provided yesterday. I deleted my old comment on not getting the same output as you did, as I do get the same output. I guess my mind had become a bit foggy yesterday after a long working day, I must have looked at the wrong output file. For which I apologize.

It seems to me that the plugin is producing acceptable results when deleting the brace layers it uses. Maybe (hopefully) my usage scenario is such that I can do without brace layers.

For now, I will continue my trial and attempt to create some good icons in just the way you described.

Once again I would like to thank you very much for the support you provided. You have been a great help indeed!