I want to make all the strokes in a glyph thinner.
If the strokes are all horizontal or all vertical, I can scale horizontally or vertically to get this effect. But what if there are curved or diagonal strokes?
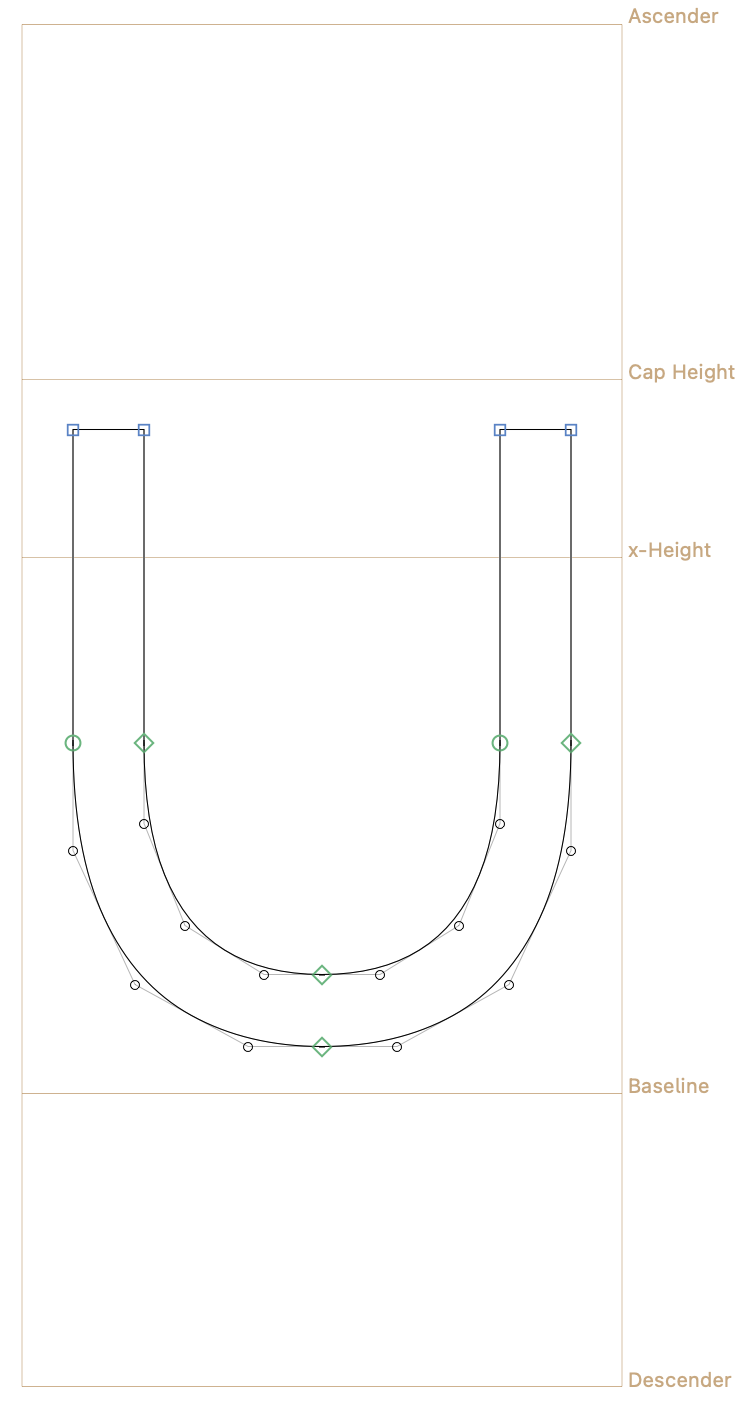
I am enclosing a screenshot of math union, U+222A, in Noto Sans Symbol 2 (as .ttf)
Thank you. This was helpful and partly worked. But I had two problems with it. (As a preliminary matter, when converting to cubic curves I got a message about discarding true type information; and I did not see in the manual where the actual definition of X and Y in offset was, so I guessed they were percents?)
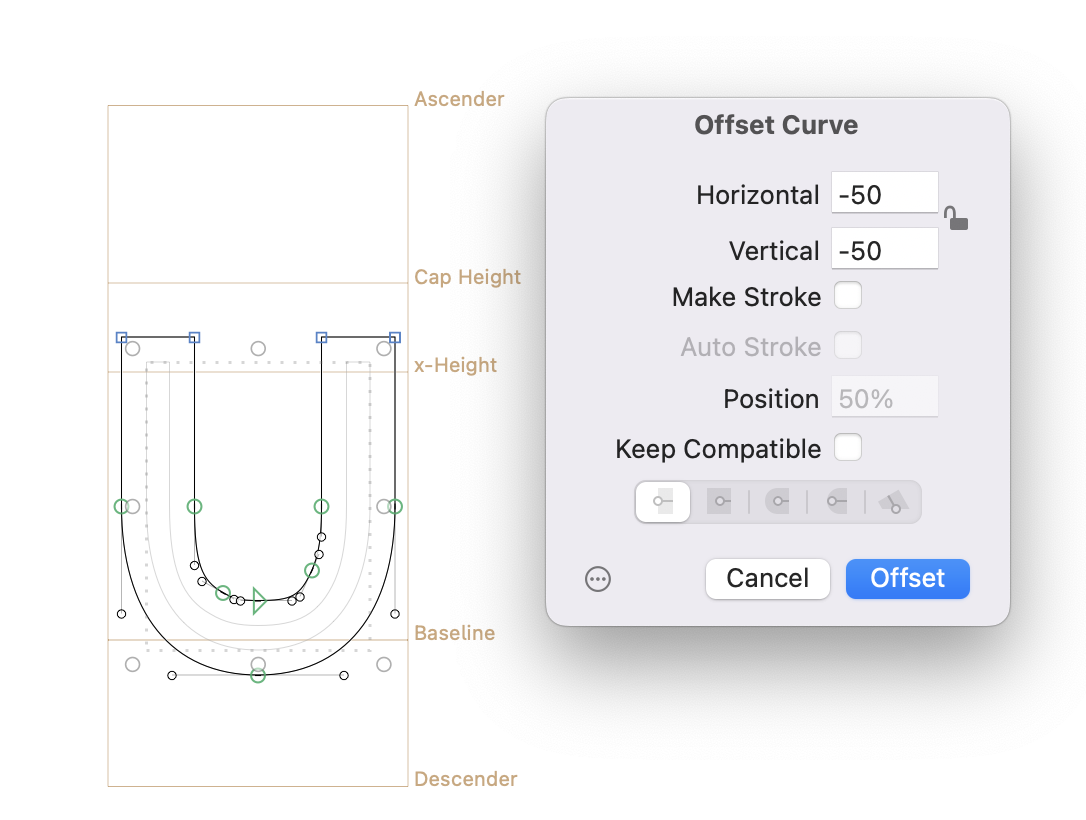
Problem 1: After thinning the glyph at one point, I tried to adjust the thinning amount. I seem to have reached a configuration in which running the offset curve with negative X and Y makes the glyph fatter, not thinner. Maybe I turned the glyph inside out somehow? I could probably start over from backups but am curious what is going on.
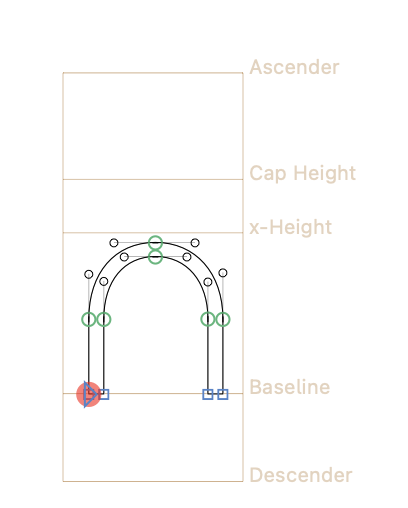
Problem 2: I tried this method on another glyph, intersection (U+2229) . Here, one corner of the glyph had a red circular highlight on it, and that corner was not moved upward by the offset curve. The right corner of the glyph raised a bit, so that after the offset curve, the left leg of the intersection symbol was lower than the right leg.
In the screenshots below, I will show the glyph before the applying offset curve, and then after selecting it (with select all) where a preview of what would happen if the offset curve settings were applied is shown:
That happens when you have imported a TrueType file. There is some low level hinting stuff that is preserved to be able to get the same output. You don’t need that, just hit OK.
That are font units. The same unit you see in the coordinates, width and sidebearings.
When you keep shifting the nodes they will indeed flip over and become thicker again. That should be easier to understand when you know what the values mean.
That means there are two nodes on top of each other. Click on the red dot to select a node and hit delete.