Ideas for types of measurement tools

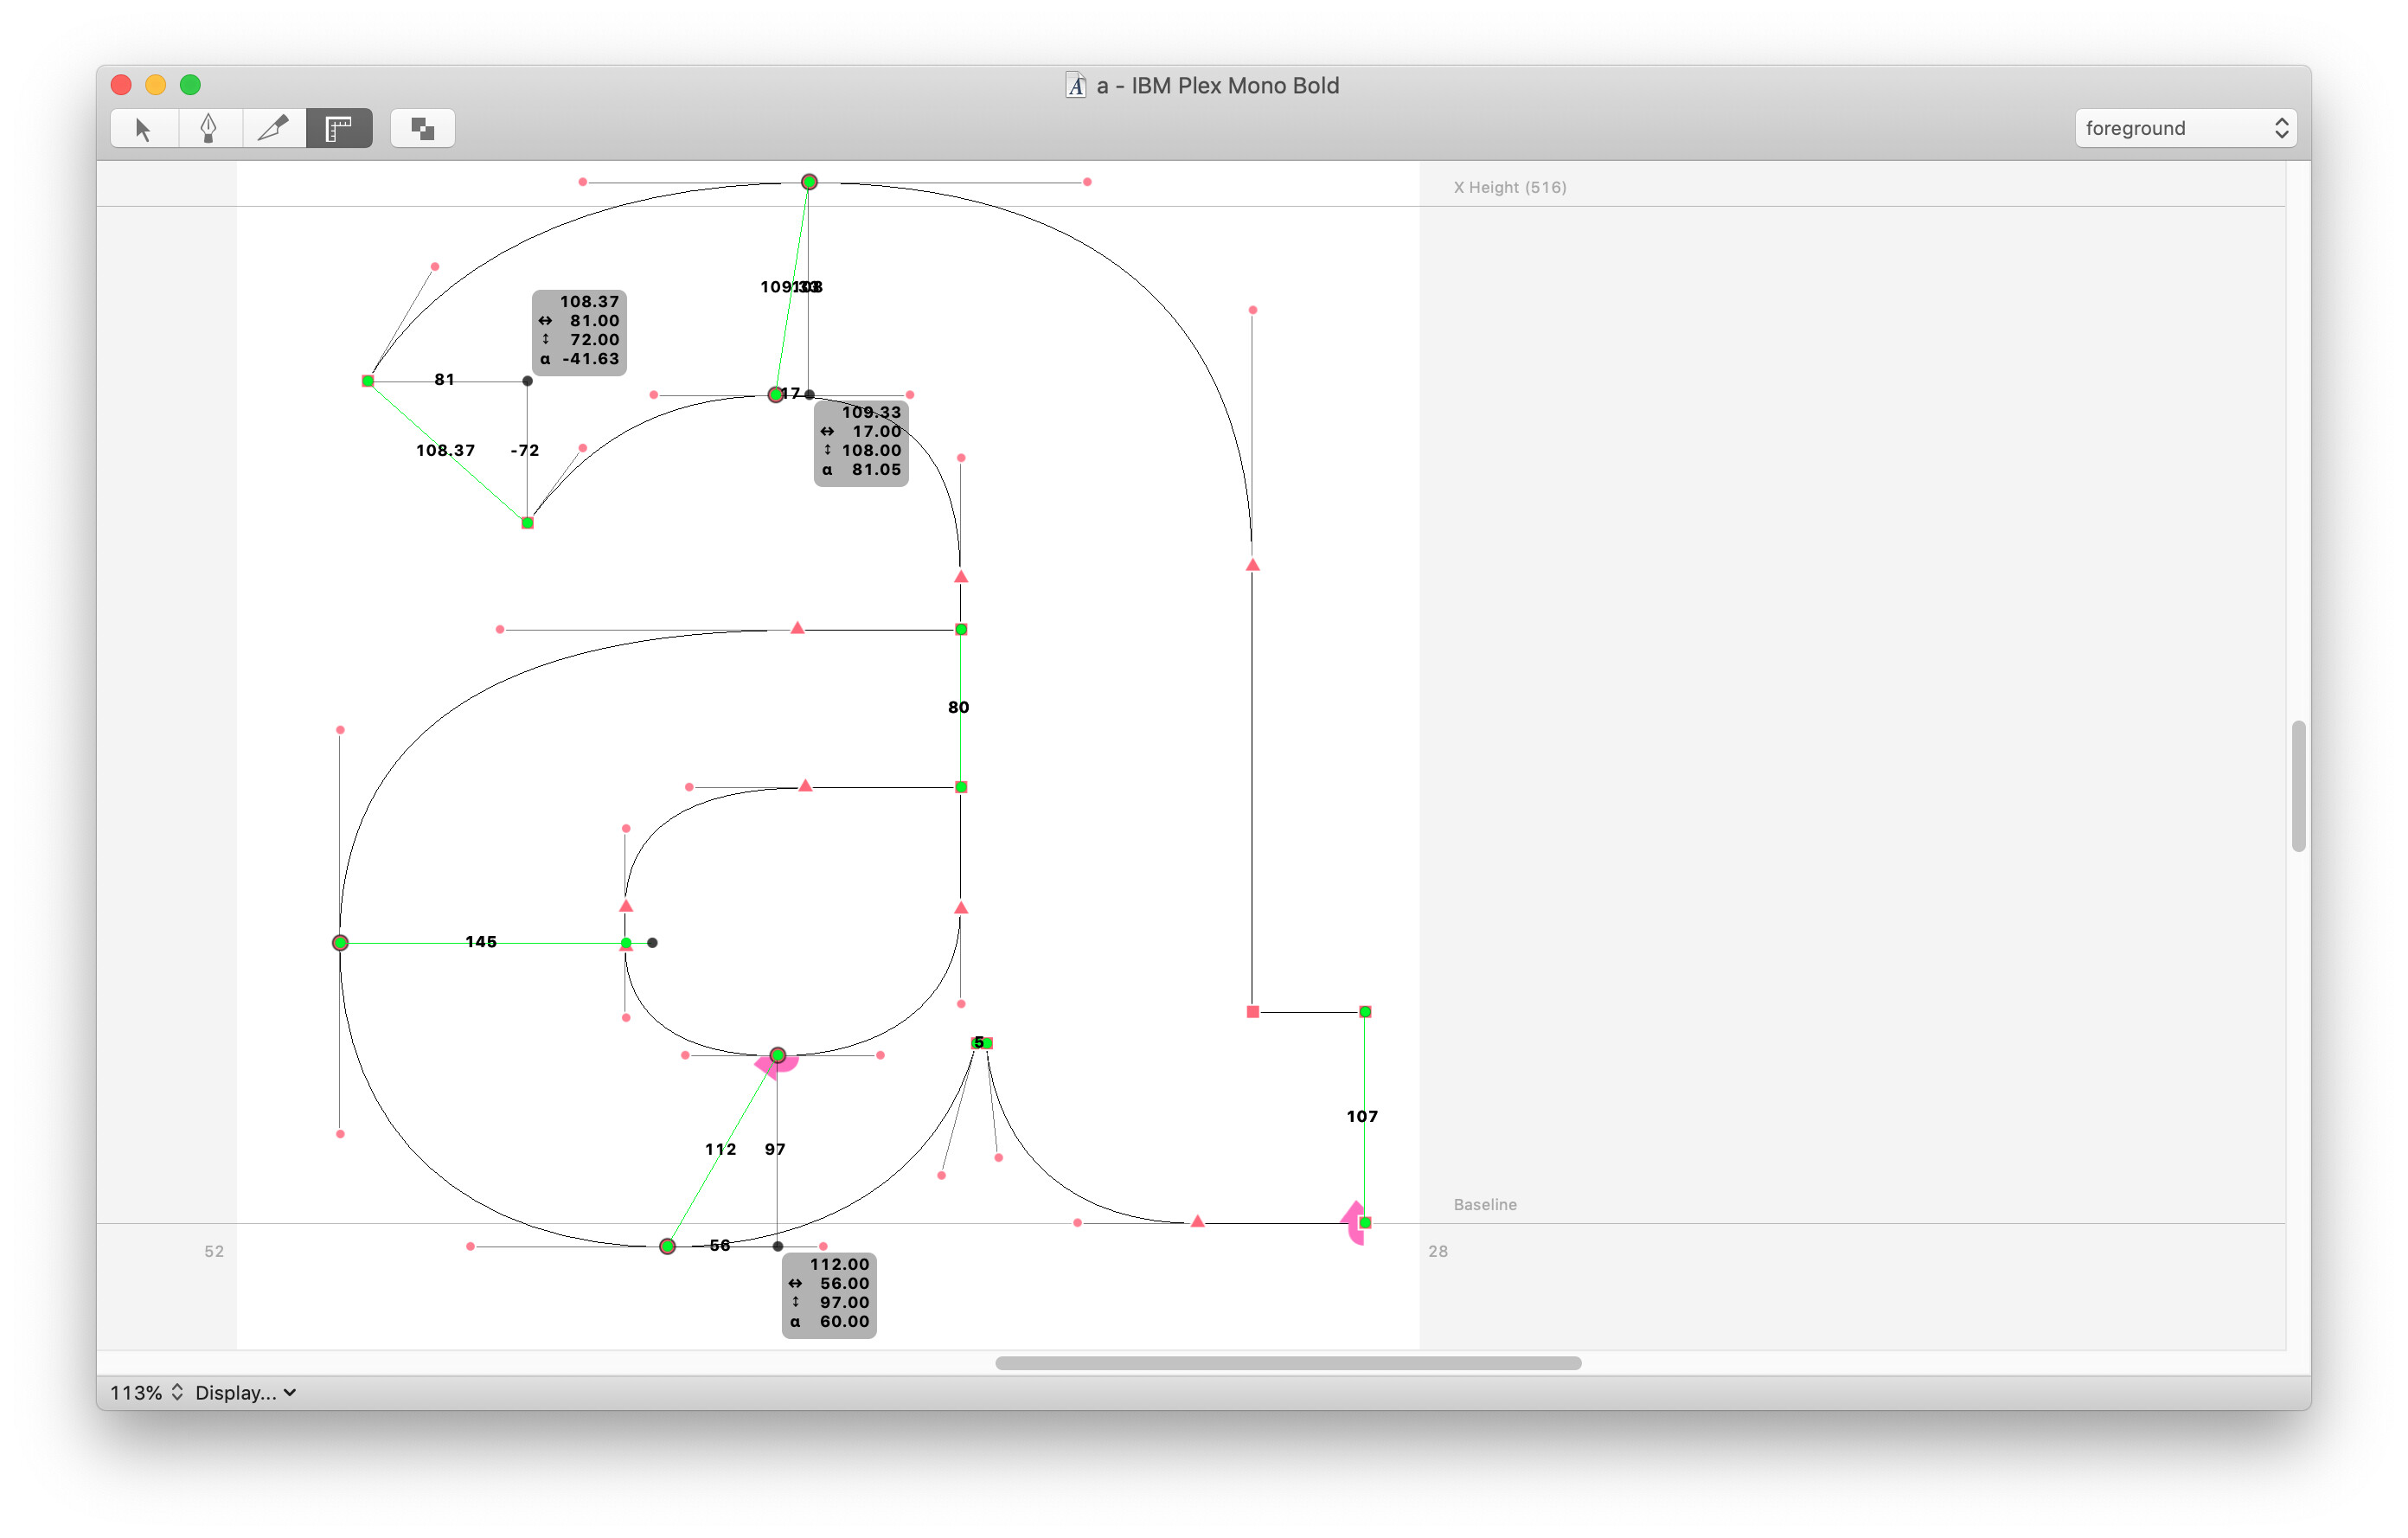
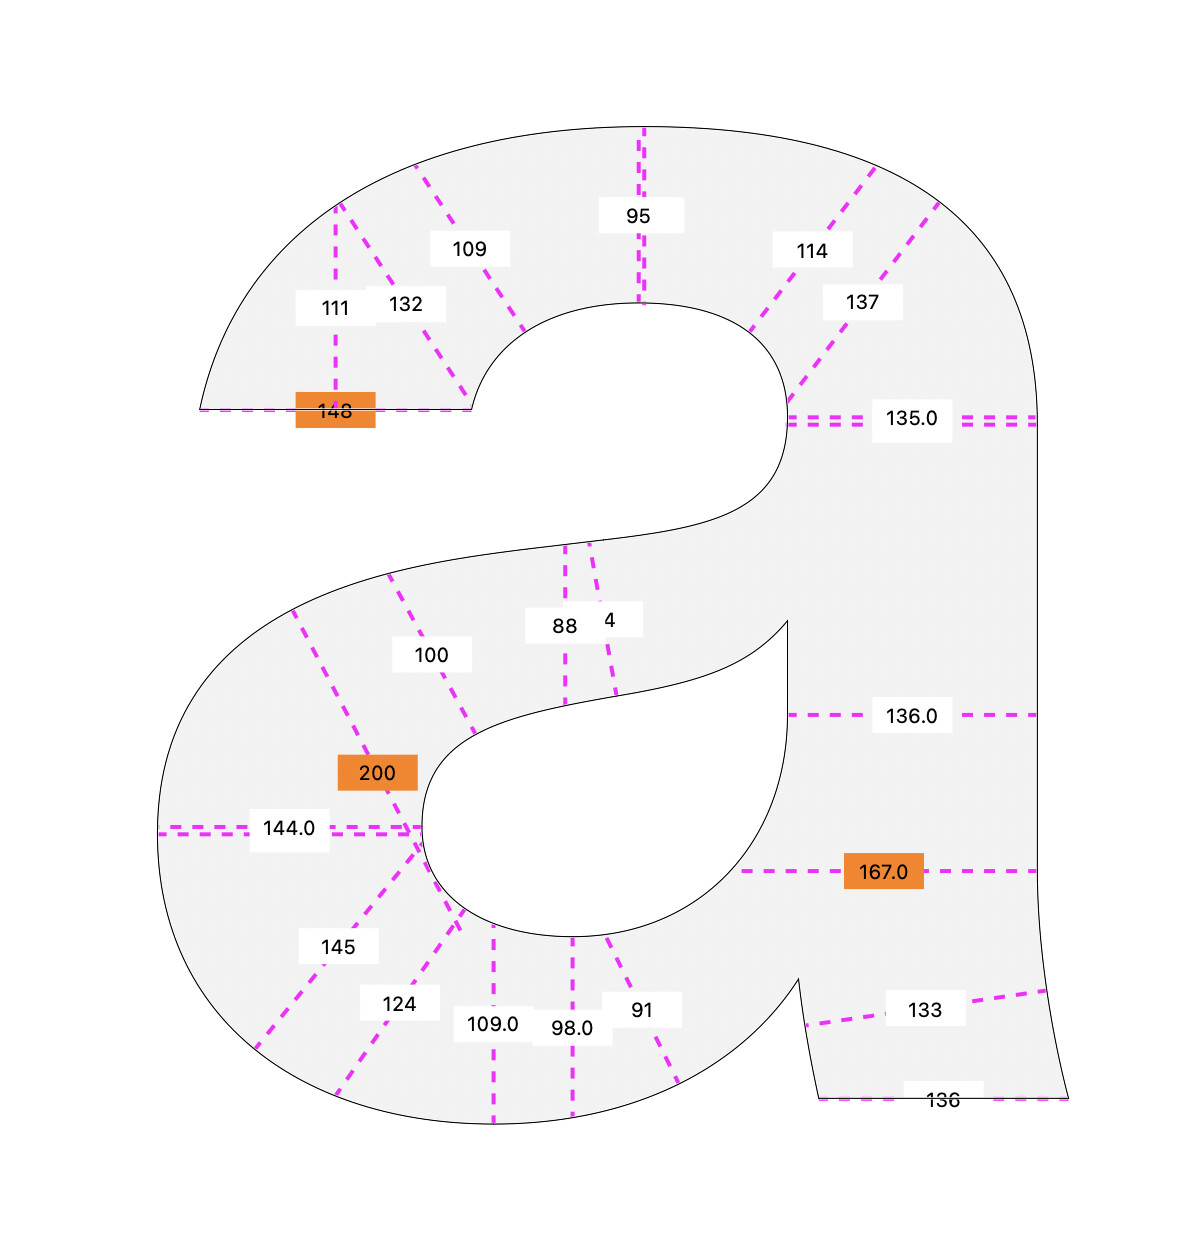
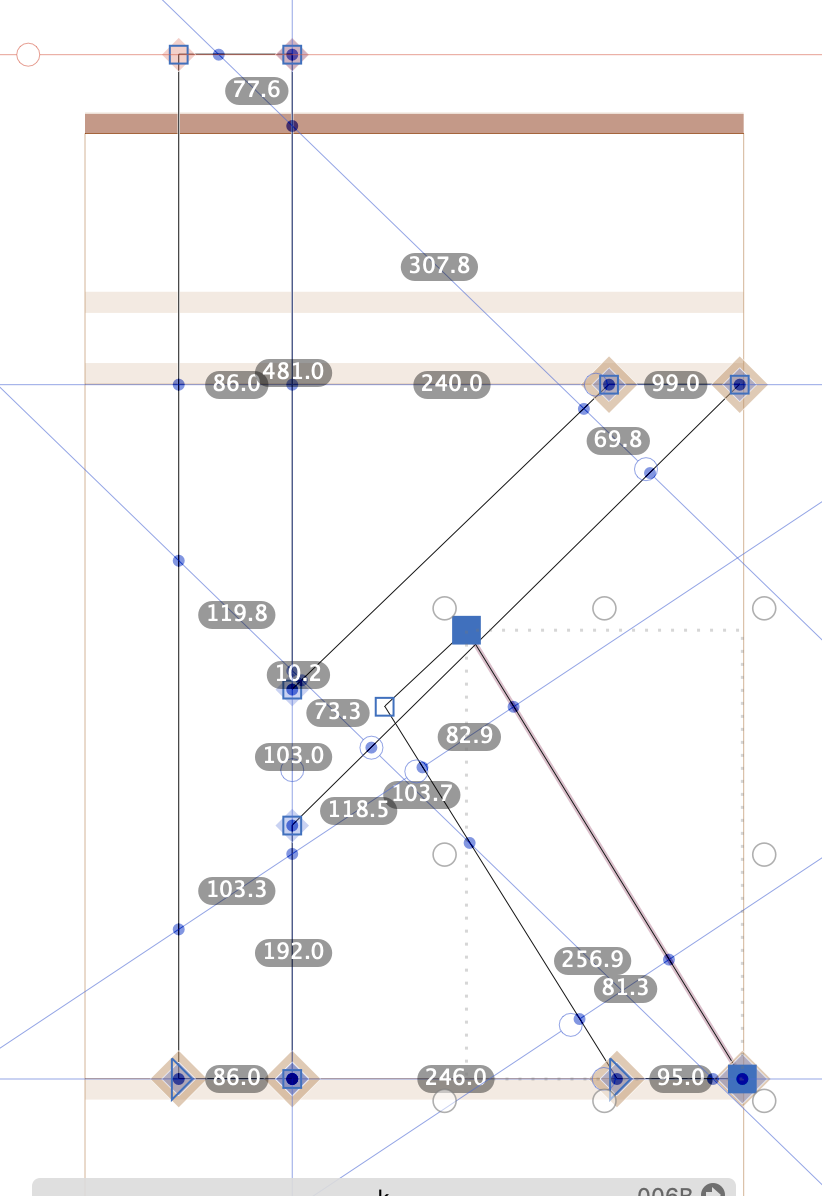
While a guideline is helpful in seeing measurements across an entire section of a glyph, I often find that there are only select portions of a glyph that I am trying to measure. Adding guidelines to measure only certain portions quickly becomes a visual mess (especially with multiple diagonal lines) because a) the guidelines extend infinitely across the window b) the rest of the measurement happening along guideline become irrelevant information/visual noise.

(Thinking out loud)
I wish there were types of measurement tools that go from general to specific

Type 1: Infinity extending (default)
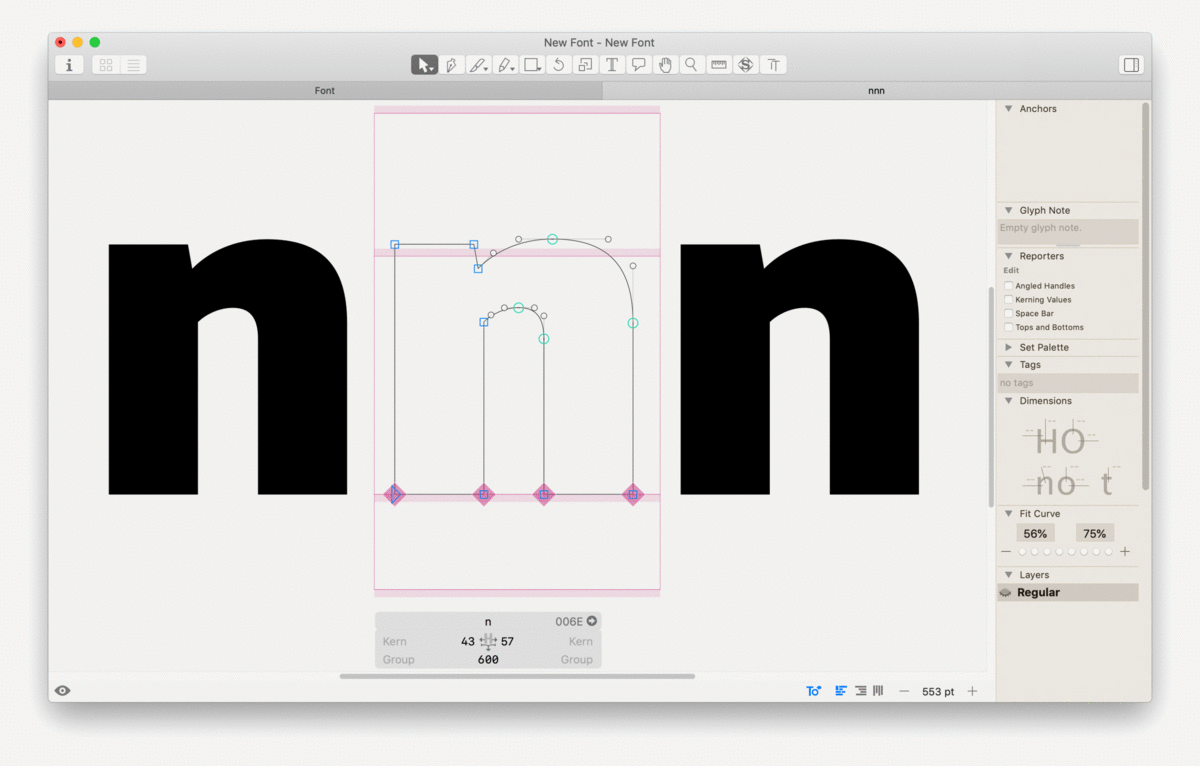
In addition to measurements across a glyph, it is also helpful to see alignments across a series of glyphs.

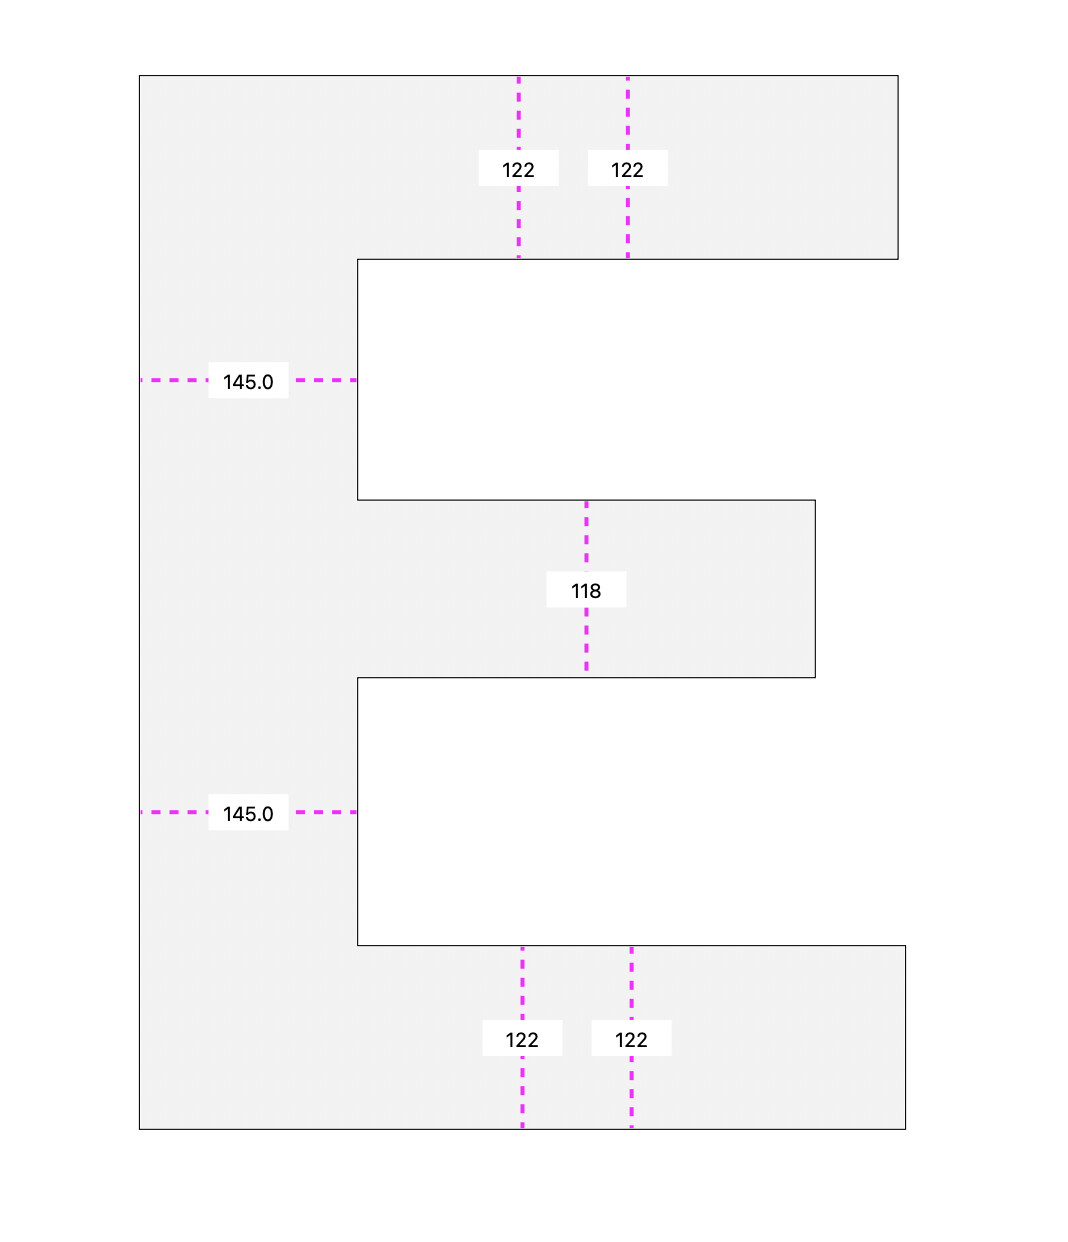
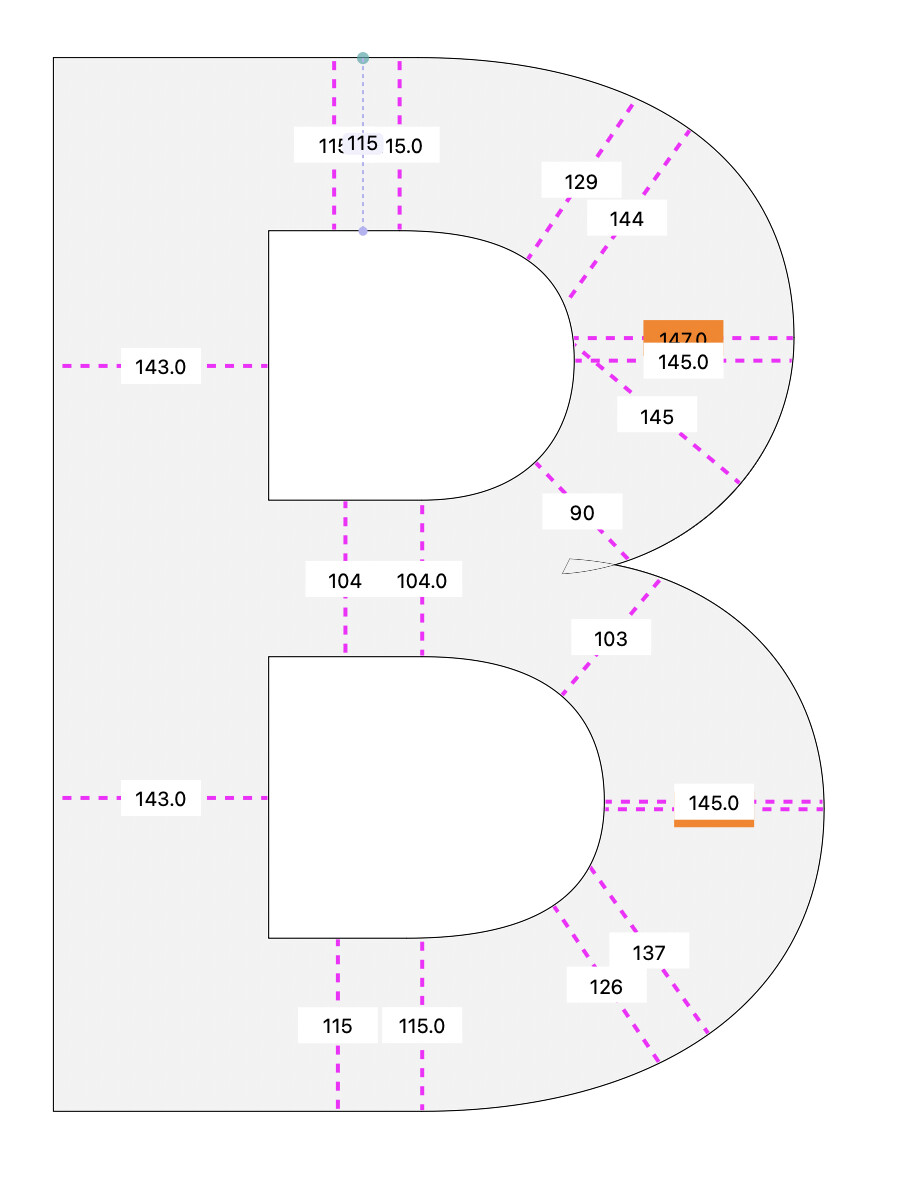
Type 2: Limited to metrics bounds of each glyph
Instead of extending the guideline fully across the window, it would be clipped at the metric bounds. This could be used a type of local guideline. This is a feature I really appreciate in @Mark Fromberg’s Show Stems.

Note: A correlation is how in InDesign rulers can be placed on either a page or extend across a spread which is toggled with the command key.

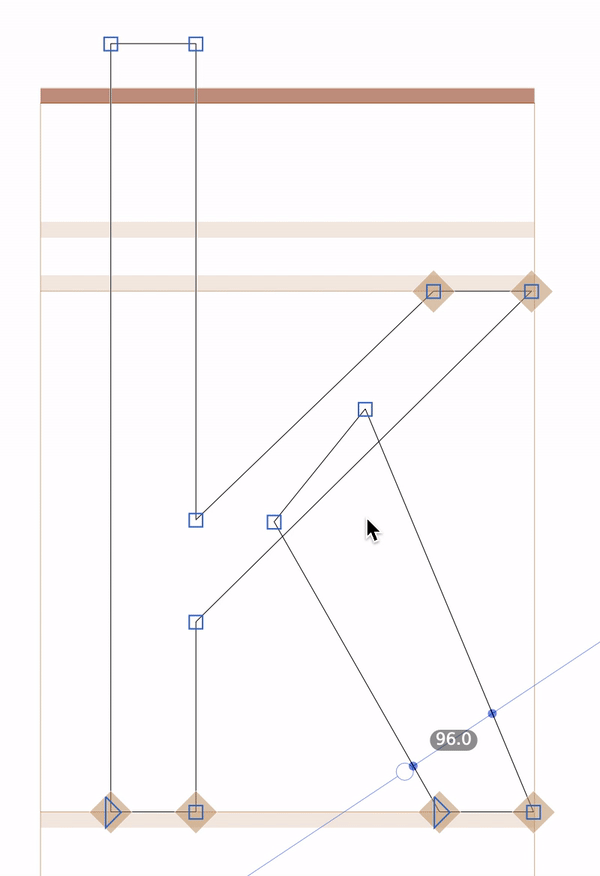
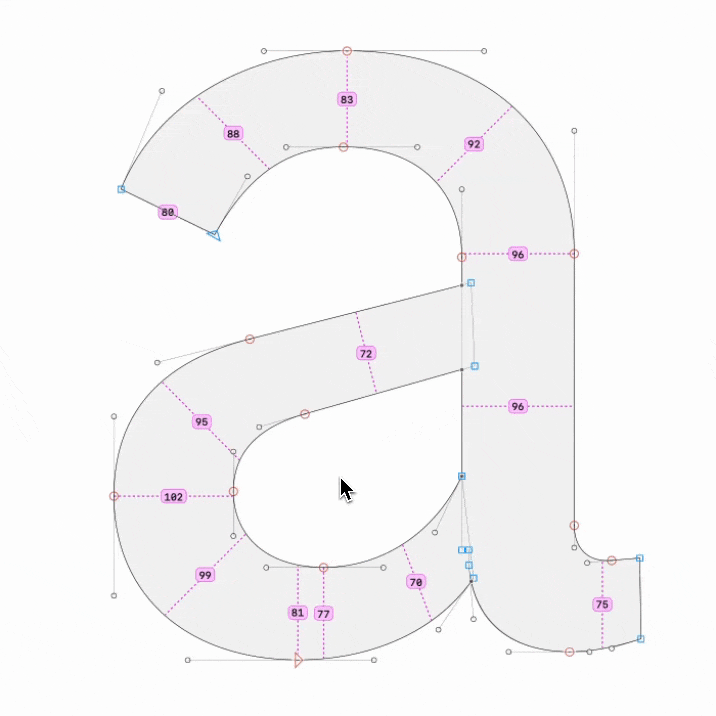
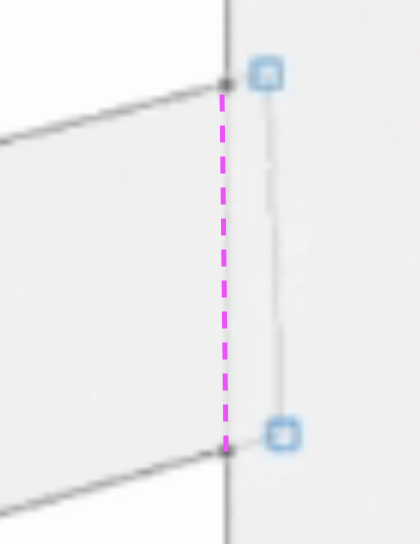
Type 3: Limited between nodes
Select any two nodes and click a measurement button (similar to the changing a guideline to measuring line) to give a live read-out of that distance/angle. The similar idea to the Show Distance and Angle but allow multiple read-outs which would remain while nodes are adjusted.

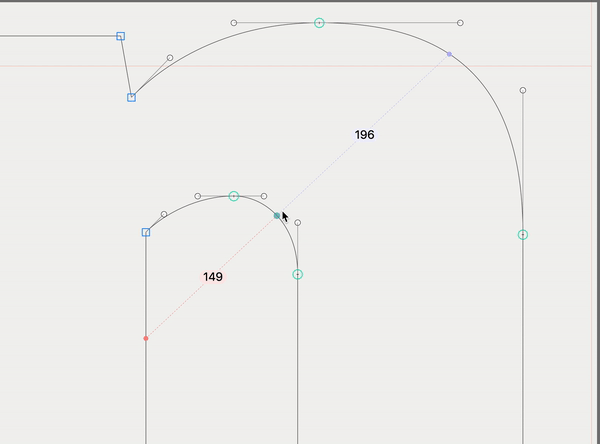
Type 4: Limited between segments
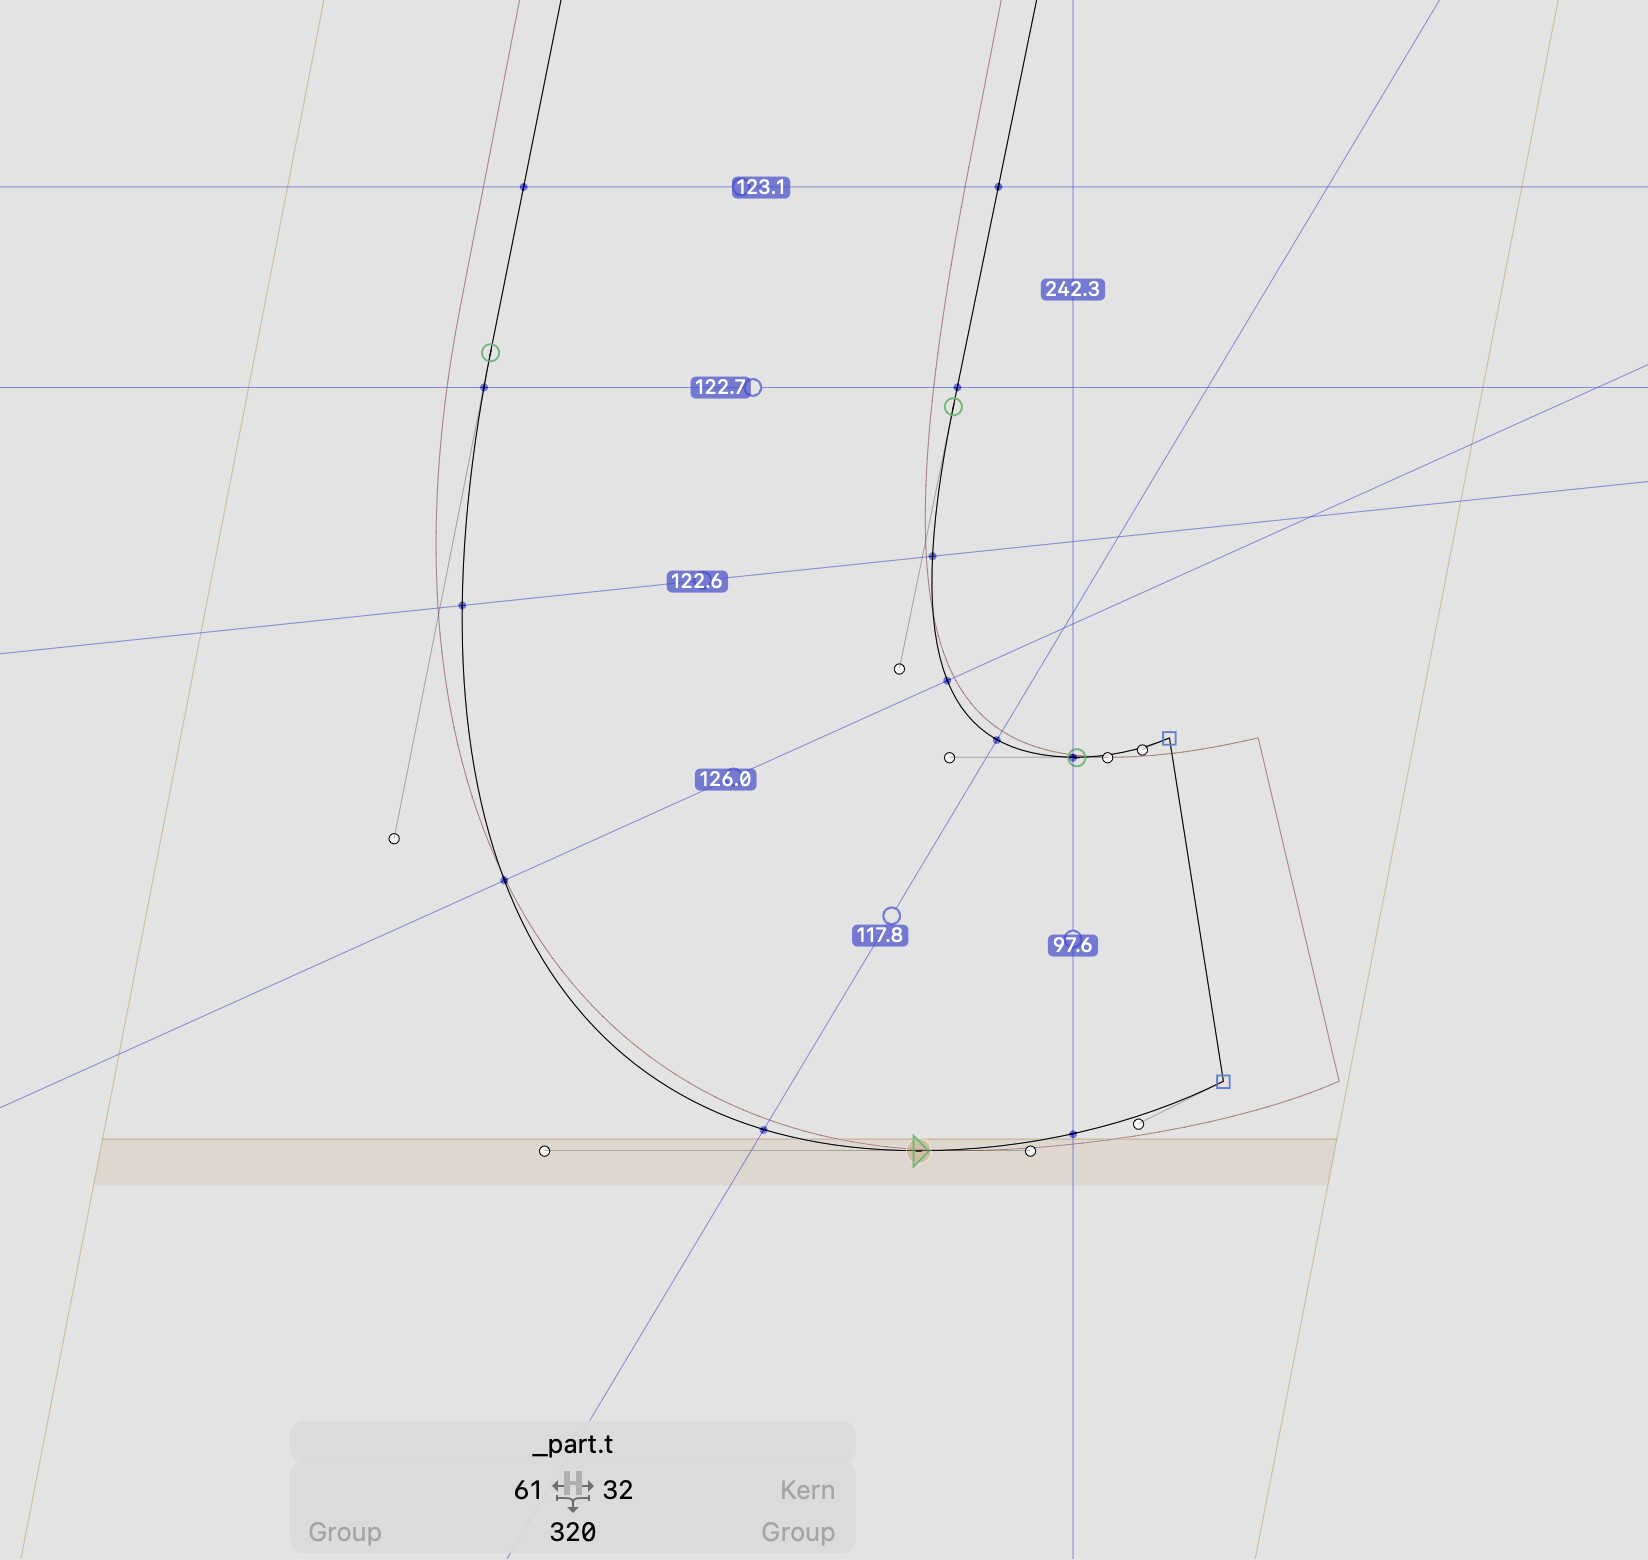
The best example of measuring select portions of a glyph I found is using Show Stem Thickness by Rafal Buchner (@RafalBuchner). It’s advantages are:

  1. Subtle measurement reading
  2. The measurement moves with the mouse cursor
  3. The key feature is the dynamic measuring of the true thickness between two segments
  4. Two-finger click reveals an option to Add Measurement Guide

In essence, the idea is that the added measurement guide of step 4 would retain the same limited measurement line between the segments and still provide dynamic/live read-out of measurement information.

The benefit of this would be the ability to add multiple measurement read-outs across different portions and at different angles without creating a chaos of lines going across the window.

Perhaps this can be accomplished with a sort of guide-node which when placed between segments would draw a line measuring only the closest points (similar to how the cursor position of the mouse works in Rafal’s plugin). As portions of the segments are adjusted the results will always be accurate read-outs of the thickness.

Made a short video using the Show Stem Thickness plugin, hopefully, it illustrates what I mean.

com-video-to-gif

2 Likes

I think most of what you need it already in a future version.

3 Likes

Have there been any new features in G3 relating to the measurement tools/guidelines?

Here is a visual of the different types of measurement tools based on levels of information…going from measure everything the guideline touches across the editor window → to only provide a limited measurement between select nodes or segments.

ideas_for_types_of_measurement_tools

1 Like

The problem is, how would you keep track of the ‘right’ place to measure once the shape changes? Think of resetting start points, added and subtracted points, the path merged with another, the path cut in two halves, etc.

Also, if the goal is to reduce the visual noise, what advantage is there in keeping the measurements in the layer all the time as opposed to the way Show Stem Thickness works now? The problem with the screenshot up there is that there are unnecessarily many guides. I wonder in which workflow it makes sense to measure so much at once all the time.

Having said that, I could think of a solution that measures the distances between named nodes. Node names survive reordering, splitting and merging, at least to some extent.

For the live measurement between segments, the Stem Thickness plugin works based on the cursor position. The problem for me is that I want to be able to measure and edit the outline at the same time.

Sure, I can find a hack/workaround with the plugin to select handles, position the cursor, and use the arrow keys…but it’s not ideal.

dynamic_measurement_between_segments

Idea: What if there was a sort of Measurement Node (I’m imagining it is a node that has the measurement readout flag attached to it) so that when it is placed in an outline that it will act as the cursor does in Stem Thickness, and relative to that point, it will always try to measure to the nearest paths. This would make outline editing and dynamic measurement related yet independent. The nodes can be easily repositioned or removed. It could allow for placing multiple Measurement Nodes throughout the outline.

I realize that the animation in the previous post may be misleading. I am not suggesting having all of those measurements on all at once…each is an example of different types and levels of measurement. I imagine they can be used in combination or isolation.

3 Likes

Thinking about it. Maybe I can come up with a plug-in solution.

3 Likes

I recently came across the measurement tool in RoboFont which resonated with some of the ideas I had suggested previously.

drawingGlyphs_measurement-tool

I like the fact that it allows for setting shorter measurement lines that allow for focusing on a single area of measurement and are less obtrusive than a guideline that measures everything in its path.

Another neat feature is that the line can snap to two points and provide the measurement along the hypotenuse, as well as, the horizontal and verticals legs…however, one shortcoming is that the line isn’t linked to the points so if the outline is adjusted the measurement line doesn’t follow.

There may be a way to limit the amount of info in RF but out-of-the-box there is too much information


maybe something simpler, showing relevant info can be more like this

I’d be happy to hear other peoples thoughts on this.

Would something like this be possible for Glyphs?

2 Likes


In my case I always need a tool thats do exactly something like that since the very first time I started to make my first fonts. When I sketch the early ideas I used to hand draw those lines under a similar logic, just because it gives me more control over the quality of the resulting contour, and more consistency, especially on curve ones. For the moment I use regular guides, but sometimes it becomes too messy, it would nice if there an option to decide which area will be the reference intersection for certain messurement. and ignore the outside part of the guides.

Thanks for the reminder. I’ll think about it. Until then, have you tried the stems plugins?

You can have a look at the Heatmap plugin by Simon Cozens:

The plugin doesn’t directly display measurements but allows you to visually see weight distribution in a Glyph.

2 Likes

yeah, it helps a little but not as precise as numeric values could do. If heat map could display a serie of intermediate values it would result more helpful, a visual gradient just give us a vague approximated clue of what is happening with the thickness of the curve. Maybe I could learn Python and do that dreamed tool by myself… :joy:

1 Like

hi,
You can try this plugin - Available from Plugin Manager.

Cheers
Eduardo Tunni

Show Thickness illustration

1 Like

Oh thank you guys, I love “Show Stem Thickness” plugin, is part of my daily workflow since years ago, as soon as saw it among the plugin manager.

The specific need here is that I would love to have is a serie of static guides that’s do same job as “Show Stem Thickness” do but keeping the values on screen, I guess its code could help as a starting point for a more advanced version that could allow us to stack more than one guide, showing multiple messurement values. It’s amazing how many tools already exist and always leave some little need unsolved.

It could looks something like this

Throwing out an idea here.
@HugoJ recently came up with a way of isolating the skeleton of an outline…what if the measurement plugin that @peggo is suggesting, takes that generated skeleton and then subdivides it into some intervals and at each interval a localized guideline is drawn within the boundaries of the outline (similar to as if the cursor was placed at interval point using the StemThickness plugin).

1 Like

Rafal Buchner’s Stem Thickness plugin (mentioned a few posts up by @etunni) would be a great starting point as it’s easy to understand and use. In fact, it’s the only plugin that I always keep installed and turned on.

The Stem Thickness plugin could theoretically be extended into a tool that attaches measurements to different combinations of nodes, similar to how the TrueType hinting tool works. For instance, you could attach it to any of the following combinations of nodes, each of which would measure in a logical way:

  • Smooth (green) node: measure perpendicularly from the node
  • Curve segment: measure perpendicularly from the midpoint of the curve
  • Line segment: measure perpendicularly from the midpoint of the line segment
  • Two non-adjacent nodes: measure the distance between them
  • Two line segments or curve segments: measure between their midpoints
  • Inside corner node: measure perpendicular to both adjacent segments
  • etc…

EDIT:

I hope that was intelligible to at least a few people. I don’t have time to build something like this right now, but if anyone else is working on something similar and wants some ideas, feel free to get in touch.

I also think it might be possible to automatically add measurements to a glyph, using an algorithm similar to the autohint function within the TrueType tool, or via some simpler algorithms like one that detects points on opposite sides of a stem.

And one last thing to add: implicit nodes might be useful for this, but I’m not sure if the API exposes them.

2 Likes

I’m currently working on a plugin very similar to what you described, @justinpenner. Here is a screenshot of its current state. Tons of things still need to be implemented or fixed, but it already doesn’t look so bad.

12 Likes

Wow, congrats Hugo, finally our prayers was been listened :pray:!

P.d. if you need a beta tester help to get early feedback, here I am to help as long as I can.

1 Like

I continue to make slow progress on this plugin, but I have already reached a point where the measurement lines shown are interesting :raised_hands:

The most challenging aspect is not drawing these lines, but deciding which ones to omit, keeping only the essential ones.

Export-1712815861467

7 Likes

This is incredible Hugo! :clap:

Is it possible to access and measure between those gray nodes that appear when outlines overlap? These types of measurements might also be useful.

Screenshot 2024-04-11 at 10.27.18 AM

1 Like

Great work