Showing nodes and handles in Drawbot with custom colours

Hello there, I’m a complete newbie both in Drawbot and Python so I apologise in advance.

What I am trying to achieve is a way to export on Drawbot a PNG (or a PDF I don’t mind) of a glyph from a font I created, with the handles and nodes of the Bezier curves showing, and set in custom colours. Like on this picture. I highly suspect it’s simple but I am a total beginner in scripting, I have been looking for over an hour and I can’t find anything related to this. I would super appreciate any advice please! Thank you so much!

1 Like

Hi, are you sure that was achieved in DrawBot? I myself am not aware of a way to display handles and nodes of a font (without converting it to a bezier object) in DrawBot.

Instead, for that, I highly recommend the Presenter Plugin by @mark. The free version might suffice but the full version is definitely more than worth its very modest price tag.

Thank you for your answer! I am 90% sure that one of my teacher showed it to us with Drawbot last year, but of course I might be wrong. Maybe that’s why I can’t seem to find anything related to it! I am definitely going to try the Presenter Plugin, thanks so much!

I wouldn’t be surprised if DrawBot was able to do so, I just haven’t found out how to do it myself. If you (or others here) find out, please let me/us know!

There was a script by Frak Grießhammer, unfortunately I can’t seem to find it at the moment.
It basically does what @SCarewe said, turning the glyph into a bezierpath object, drawing the outline and then you can loop through the contour and draw rectangles and circles where the on-/off-curve points are.

Although the presenter is nice and has I think 2 or 3 functionalities I wasn’t able to achieve with drawbot yet, drawbot is considerably cheaper (since it’s free).
Also if you know a bit of python, it is very well documented and together with the font parts docs you should be fine :slight_smile:

Ah, a manual way you could do it, I guess, is converting your outlines to a bezier path and then using path.offCurvePoints/path.onCurvePoints, which returns a list of all the off-/oncurve points of a bezier path. Then draw a circle for each coordinate in the list.

Drawing the handles in not that difficult. “Just” integrate all nodes and draw box at its position.

Thank you so much to all of you! How would I integrate all nodes and draw boxes please? For now, when I open Drawbot I don’t have any code in it, I don’t know if that’s normal, again sorry complete newbie here. With a little bit of messing around I managed to get something, like changing the colours, centring the glyph and putting in my own font, but I have no idea how to move on from there. Thanks lots!

I may just purchase the Presenter Pro, but I am curious to know if it can be done automatically and for free first :slight_smile:

a) Don’t draw a letter from an installed font but from a open font in Glyphs.
b) Iterate the nodes of the BezierPath.

That looks really good!!

Why not drawing from a test installed font? It’s handy since you don’t have to remove the overlaps.

You can loop through the contour with something like:

for contour in B:
  for segment in contour:
    if len(segment) == 3:
      offcurve1, offcurve2, on curve = segment
      oval(offcurve1[0], …)

    else:
      oncurve = Segment [-1]
      rect(oncurve[0], …

Thank you very much too all! I think that in the end coding anything is way over my current capabilities so with a bit of tinkering with Presenter and Photoshop I managed to achieve the results I wanted. It’s definitely not automatic, but it’ll do for now. I’m still very curious to know if the result shown in the first picture was with Drawbot but I’m still awaiting my teacher’s answer, I will keep you updated! Thanks again!

here is a sample script that should help you getting started:

from GlyphsApp import *
import os

filedir = os.path.dirname(__file__)
#filedir = os.path.join(filedir, "Subfolder")

def drawOnNode(node, handleSize):
    if handleSize == 0:
        return 
    pt = node.position
    nodeType = node.type
    size = handleSize
    fill(1,1,1)
    if nodeType == GSCURVE or nodeType == GSLINE:
        rect(pt.x - (size / 2), pt.y - (size / 2), size, size)

def drawOffNode(node, handleSize):
    if handleSize == 0:
        return 

    pt = node.position
    nodeType = node.type
    size = handleSize
    fill(1,1,1)
    if nodeType != GSCURVE and nodeType != GSLINE:
        index = node.parent.indexOfNode_(node)
        prevNode = node.parent.nodes[index - 1]
        nextNode = node.parent.nodes[index + 1]
        if prevNode.type == GSOFFCURVE:
            newPath()
            moveTo(node.position)
            lineTo(nextNode.position)
            drawPath()
        else:
            newPath()
            moveTo(node.position)
            lineTo(prevNode.position)
            drawPath()            
        oval(pt.x - (size / 2), pt.y - (size / 2), size, size)
    
def drawSize(layer, Width, Scale, handleSize = 10):
    newPage(Width, Width)
    offset = (Width - (layer.width * Scale)) / 2
    translate(offset,offset)
    scale(Scale)
    fill(1,0.15,0.15)
    drawPath(layer.bezierPath)
    save()
    strokeWidth(1.1)
    stroke(0.5,0.5,0.5)
    for p in layer.paths:
        for n in p.nodes:
            drawOffNode(n, handleSize)
        for n in p.nodes:
            drawOnNode(n, handleSize)
    filename = os.path.join(filedir, "icon_%sx%s.png" % (Width, Width))
    saveImage(filename)

layer = Glyphs.font.selectedLayers[0]
layer = layer.copy()
layer.removeOverlap()
drawSize(layer, 1024, 1.244, 10)
drawSize(layer, 512, 0.62, 22)
2 Likes

I’m super grateful! I somehow made it work, thank you so much!! I still get an error, but I assume it has something to do with the output of the image, I’m not too worried about that since I can just take a screenshot. Now I just need to figure out how to change the background colour but I’ll just tinker with it until I find it :slight_smile: Really thank you so much, I was going crazy trying to make it work!

That looks really good!

Your error has something to do with the way you generate the file name in the end (I usually just type it out in the command since I like to give the image descriptive names :D)

For the background colour: do it like you would do it in ID or AI, the first thing to be drawn on your canvas can be a rectangle the size of your canvas and the colour you like :wink:
Since it’s the first thing to be drawn it will be on the first “layer” and everything else will get drawn on top of it :slight_smile:

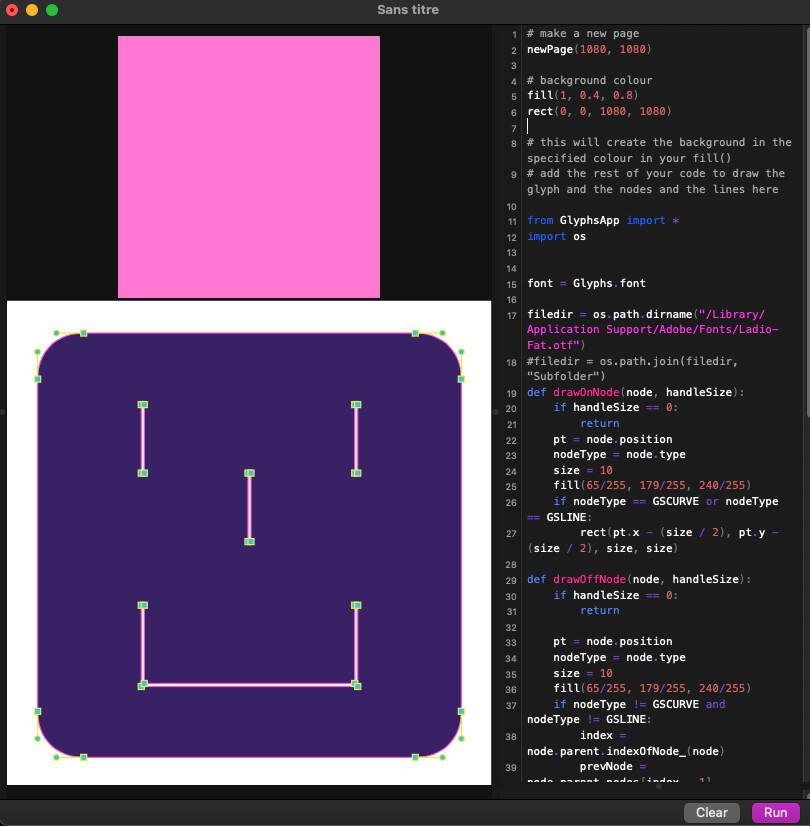
Thanks so much!! So in the end I managed to do everything I wanted, customising all the handles and nodes size, strokes size, colours, canvas size and size of the glyph within the canvas, how and where to save as png, but I admit this pesky background colour is proving more complicated than I thought. I can save the image as a transparent png so it doesn’t matter too much but I’d rather avoid the extra step of going to Photoshop if it can be done on DrawBot :slight_smile: I have tried your method @ddaanniiieeelll, in the sense that I’ve added a fill line above all the code, but it adds another canvas on top of the one with my glyph on it? I’m sorry for being such a beginner, but I don’t understand where and how I should input the fill and rectangle code, if that’s what you were referring to when you said it had to be drawn.

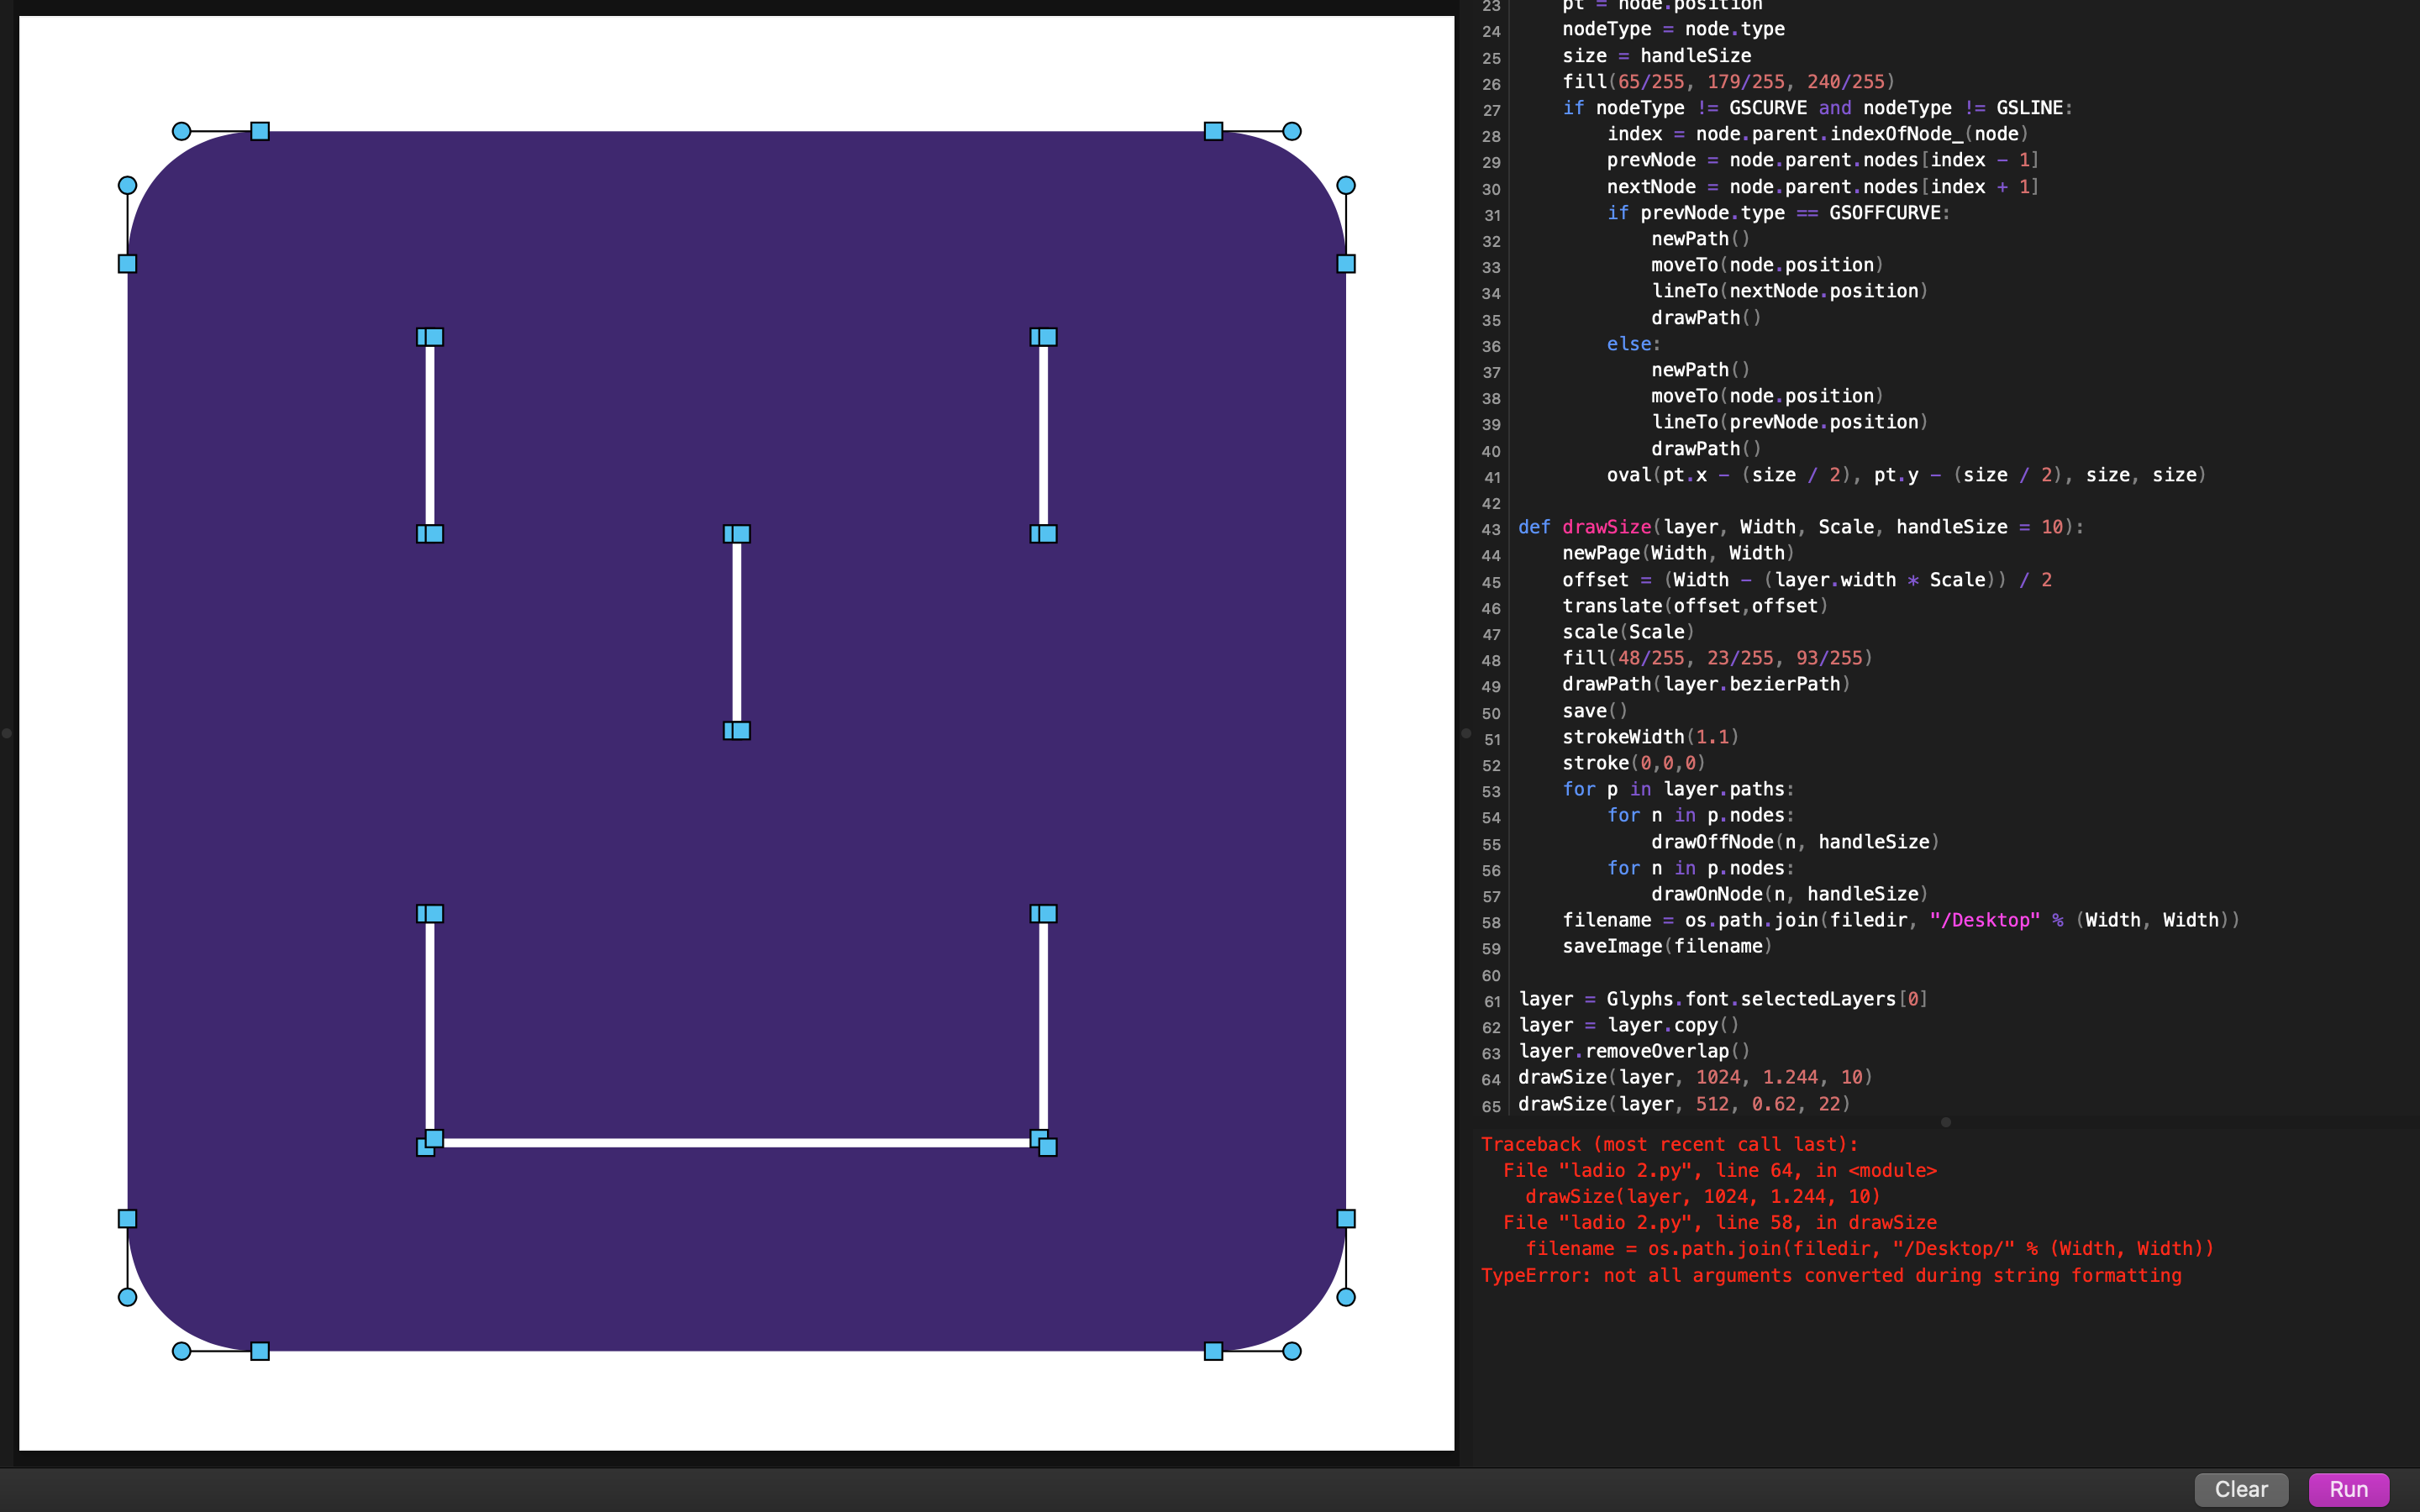
Here is some example of my code for now, which gives a transparent background:

from GlyphsApp import *
import os

font = Glyphs.font

filedir = os.path.dirname("/Library/Application Support/Adobe/Fonts/MyFont.otf")
#filedir = os.path.join(filedir, "Subfolder")
def drawOnNode(node, handleSize):
    if handleSize == 0:
        return 
    pt = node.position
    nodeType = node.type
    size = 1
    fill(255/255, 0/255, 0/255)
    if nodeType == GSCURVE or nodeType == GSLINE:
        rect(pt.x - (size / 2), pt.y - (size / 2), size, size)

def drawOffNode(node, handleSize):
    if handleSize == 0:
        return 

    pt = node.position
    nodeType = node.type
    size = 1
    fill(255/255, 0/255, 0/255)
    if nodeType != GSCURVE and nodeType != GSLINE:
        index = node.parent.indexOfNode_(node)
        prevNode = node.parent.nodes[index - 1]
        nextNode = node.parent.nodes[index + 1]
        if prevNode.type == GSOFFCURVE:
            newPath()
            moveTo(node.position)
            lineTo(nextNode.position)
            drawPath()
        else:
            newPath()
            moveTo(node.position)
            lineTo(prevNode.position)
            drawPath()            
        oval(pt.x - (size / 2), pt.y - (size / 2), size, size)
    
def drawSize(layer, Width, Scale, handleSize = 10):
    newPage(Width, Width)
    offset = (Width - (layer.width * Scale)) / 2
    translate(offset,offset)
    scale(Scale)
    fill(0, 0, 0)
    drawPath(layer.bezierPath)
    save()
    strokeWidth(0.5)
    stroke(255/255, 0/255, 0/255)
    for p in layer.paths:
        for n in p.nodes:
            drawOffNode(n, handleSize)
        for n in p.nodes:
            drawOnNode(n, handleSize)
            
    saveImage("/Users/Me/Desktop/test.png")
   
layer = Glyphs.font.selectedLayers[0]
layer = layer.copy()
layer.removeOverlap()
drawSize(layer, 4000, 5, 22)

(I apologise if the code is not formatted well, I’ve looked up how to do it but didn’t found anything)

1 Like

Python code is executed in the order it is in the script meaning if you have a structure like this:

# make a new page
newPage(1080, 1080)

# background colour
fill(1, 0.4, 0.8)
rect(0, 0, 1080, 1080)

# this will create the background in the specified colour in your fill() 
# add the rest of your code to draw the glyph and the nodes and the lines here

you’ll have a coloured rectangle the size of your canvas and everything else you draw after it with Drawbot will be drawn on top of this rectangle :slight_smile:

Thanks a lot for your help! I’ve tried it, but it keeps adding a rectangle on top of the one with the glyph. But honestly since it has a transparent background I’m not too worried, it was just to understand better :slight_smile:

Here’s the result I got:

I thought I needed to put it on top of everything, but maybe it’s in the wrong place? But yeah not too important, thank you so much to all of you for your help!

1 Like

I’m no python expert, but it probably has to go somewhere inside one of the drawing functions.
I don’t work with def’s in my entire script (It didn’t make sense when I started writing it, since I added the features on the go and once it was working I was too lazy to put everything together into a nice python code)
Because now you’re making a new page with the background, and then the drawing of your glyph creates a new page again to draw on.

My teacher got back to me with the script they had previously provided, and it’s exactly what I had been looking for! It’s actually different from the script shared above, but the background works, so it’s fine for me. So problem solved :smiley: Huge thanks to everyone for their tremendous help, I learned so much! Hope you all have a great day!